|
We've officially started our 2016/2017 "Homeschool Year", and I figured It was time to give you an updated room tour. Like most homeschoolers, we LOVE that we aren't tied to our space. If we want to study on the road, at the park, or in the nearest cafe with WIFI we are free to do so. But the reality is, we like having a Homeschool Space. Connor and I both like to spread out. Connor prefers direct instruction-often with an Audio or video component. I am a visual learner and prefer to write things on the board when I'm explaining them (even if he doesn't look at my drawings). I like having a dedicated space where I can leave things out we are working on, but I enjoy having it separate from the main living area where I can unwind in the evenings. Having dedicated storage for all of our School Supplies makes it so I spend less time hunting down the things we need, and is less stressful for me. 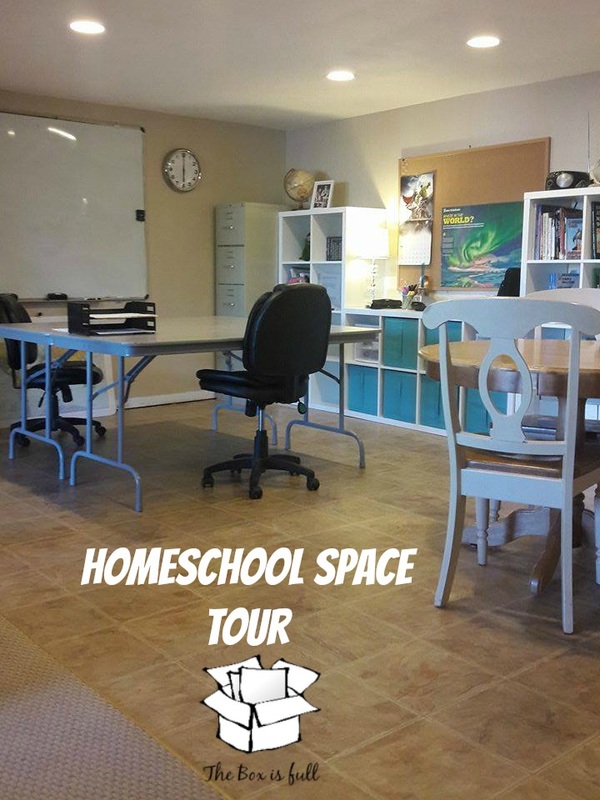 I'm actually pretty hesitant to share my space in some homeschool groups after some horrible comments people have made on "Homeschool Space" posts in the past. I like to think of our space as our Learning Space-and it works really well for us. Finding out what works out best for you and your homeschooler really is the key to creating a space (or not creating a space) that works for you. Don't rush yourself, because the reality is it doesn't happen overnight or even within the same year (You can see an evolution of our space here). And just when you think you have it right, something is bound to change. Maybe you start traveling to your co-op's more frequently (and school on the road more), or do more lessons on line (from a desk), or in our case your basement might flood just after you remodeled your space (Boo for that!). 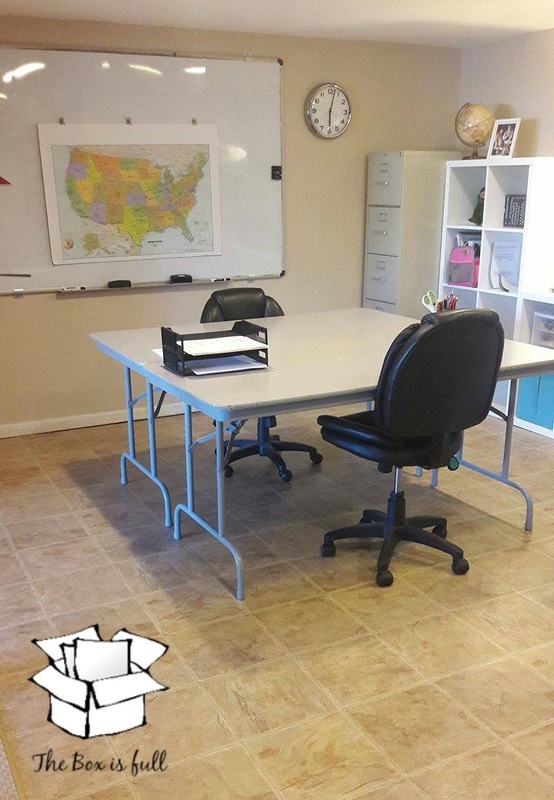 We like these heavy duty folding tables that G bought used for $10/ea. If you've been following me, you know I'm thrifty (or a tightwad as I often call myself). I really dislike purchasing something only to find out it doesn't work for me. One of my "Fails" was using the IKEA desks that I saw ALL over Pinterest. They ended up being WAY too flimsy for us. We prefer these used folding tables that my Husband picked up at a work auction for $10/each. He also brought home the big filing cabinet (Yay Hubby!). For the most part I've moved things around our space, made things myself (check out my portable Map here), or re-purposed items (such as my pot lid charging station below). Every once and a while I splurge on something new-like my Giant Magnetic Dry Erase Board, and some comfortable chairs (I must confess I did have a coupon for the chairs at Fred Meyers). 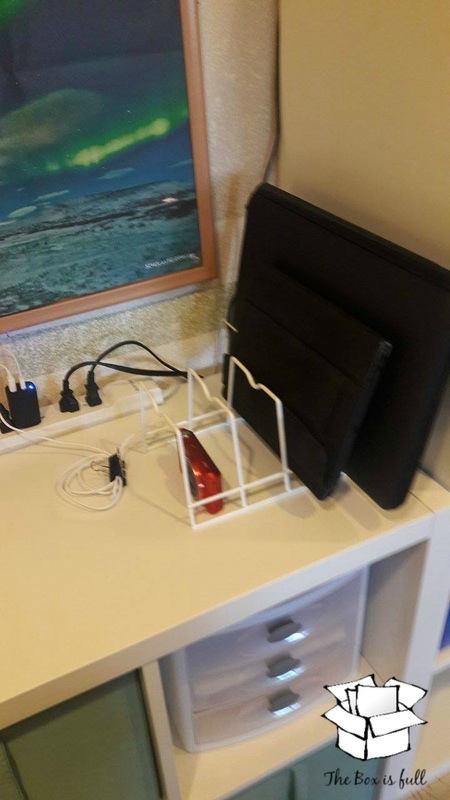 My DIY Charging Station I didn't realize how long this was going to be ... feel free to get up and take a bathroom break as needed. I've had my eye on these Kallax IKEA Shelves for quite a while. Before the flood, I knew they were much too big for our space. But after it was necessary to remodel I knew I might be able to design them into our new space. Not wanting to commit to something that might not work for our space-I thought about it for 8 months. We used the space with just our tables and some very minimal storage. It was horrible for me. I had trouble finding things, I had stuff piling on top of things. It was just a real mess for my type A personality. I can say this month, I finally committed. I purchased 3 Kallax units. One for my Teaching Supplies (left), one unit for our Homeschool Supplies (Office Supplies, Science Tools, etc), and a "Working Unit" that I stock with our current curriculum (and change out as needed). 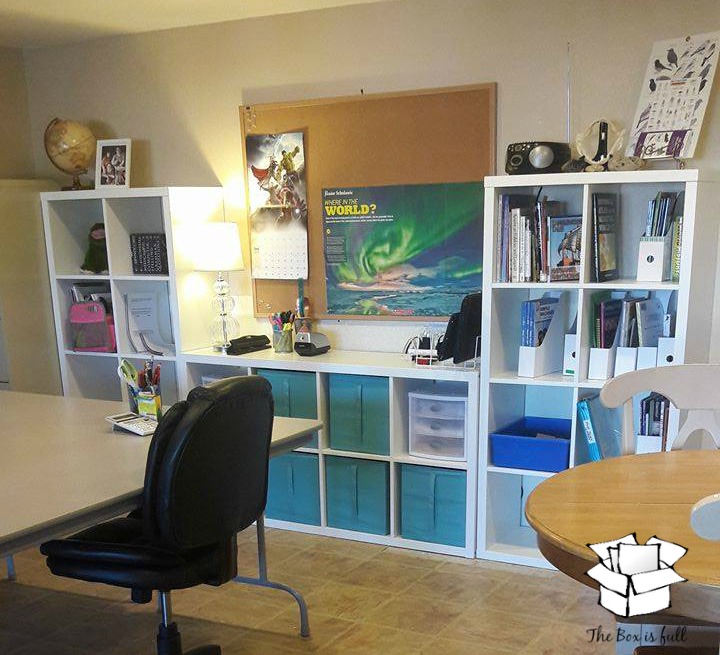 I am "lucky" to have so much space to spread out. The fact is-we actually purchased our home because of this basement space. We were looking for a home for my Home based Childcare Business (and I loved this space). When Connor was diagnosed with a brain tumor in 2009, I closed my business, and we started our Homeschool journey. It stayed "Daycare-ish" for a little while. Mostly serving as a space for company to stay during the Holidays. 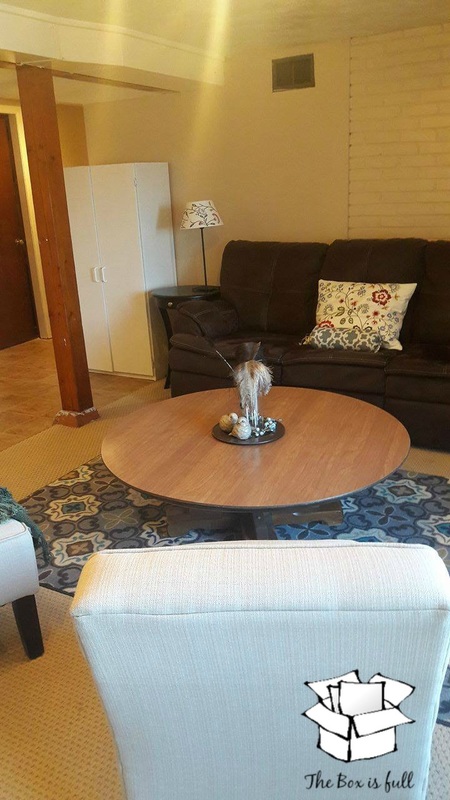 The Pull Out Sofa becomes an instant guest room! Part of my "moving" on, meant it was time to let go the rest of my Childcare things. I went on a mission to de-clutter the things that didn't bring me joy or that I didn't use. I knew I wanted to make it easier for me to locate our Homeschool resources, so a while ago I purchased a BESTA unit from IKEA. It stores our Language Arts, History, Science, and Math Books and I am able to store our Educational games in behind the closed doors down below. 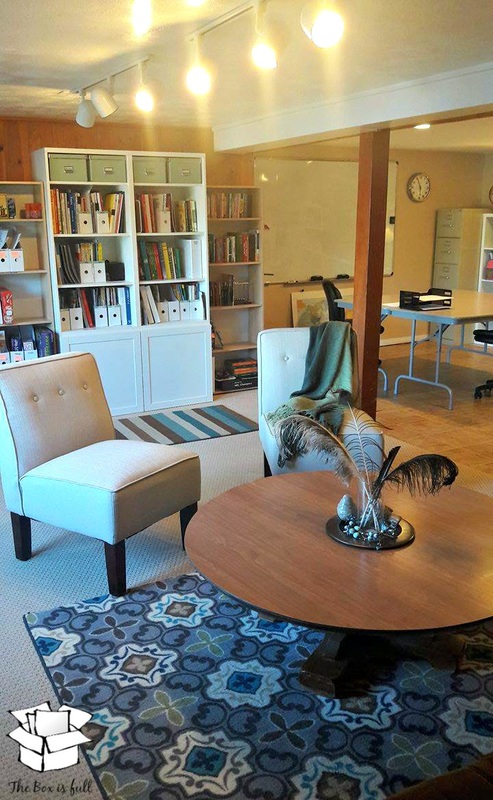 This Summer we were able to sheet rock, and texture our walls down here. Although they are "Good enough" for now, we still have plans to paint, re-do our flooring, and re-install our kitchenette. In the meantime we still have our mini fridge to keep our Drinks, Fruits, and Veggie Snacks cold. 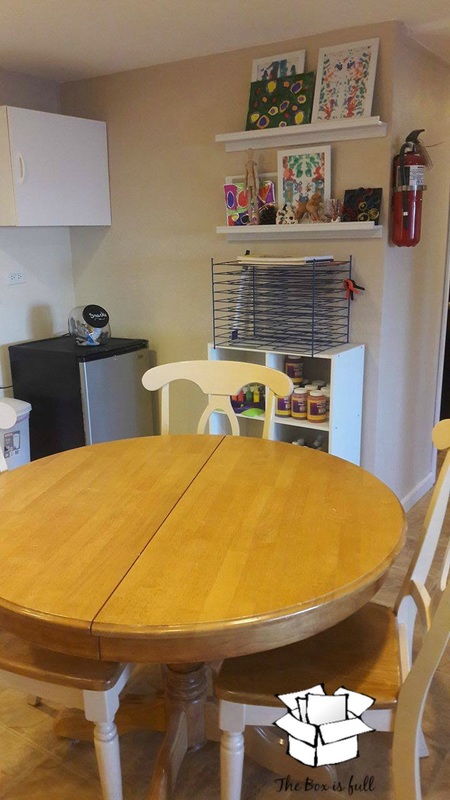 This corner is our creation station. You can get a closer look at it before our remodel here. 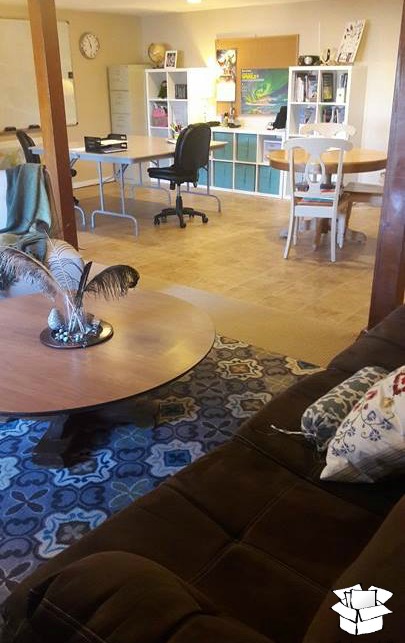 So whether you have a dedicated space, work on the couch, in the backyard or a little of both-make your space work for you! .. and if it doesn't work-mix it up.
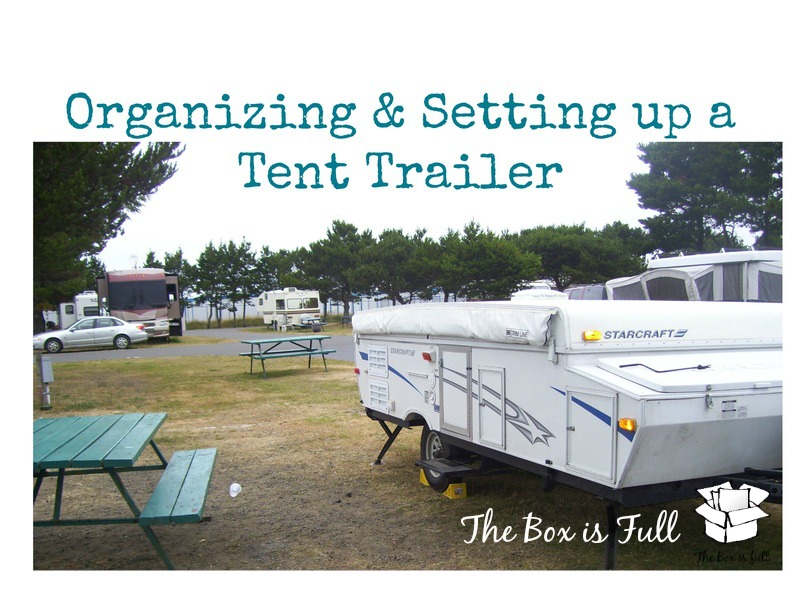
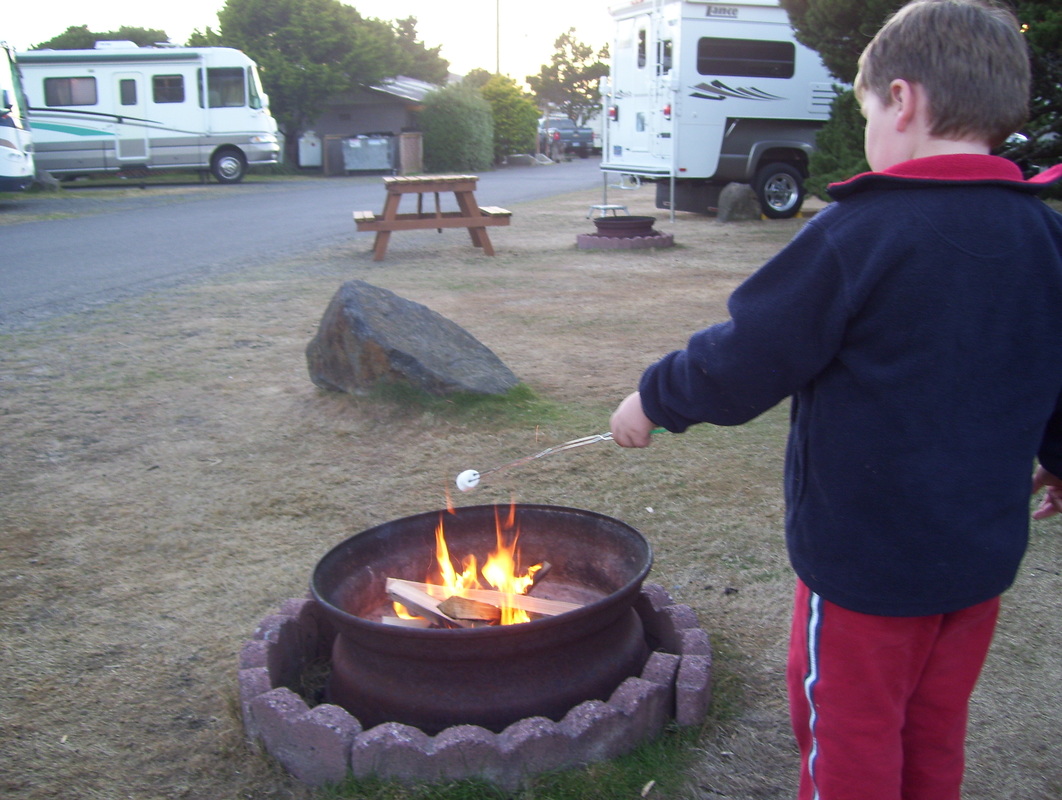
With Memorial Day right around the corner, many folks are looking for ways to Organize their Campers. Although we have recently traded in our pop-up for a Class C, we camped in our Tent Trailer for many years. Organizing such a small space can be a challenge, so I wanted to share some tips on how we organized and set up our tent trailer for quick getaways.
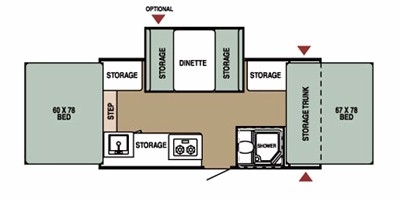
This was the floor plan of our Starcraft 2409 Tent Trailer. I find most of them have similar storage (or lack of). The red arrows indicate storage compartments that can be accessed from the outside of the unit.
For each trip we placed our Fire Prep Material (wood, newspaper, fire starters) in the front storage trunk (closest to the external door on the entry side of the trailer). When we wanted to to make a fire we just grabbed what we needed out of the access door on the front side of the trailer.
We also used this storage box to store our food box (See how we packed it here), Sleeping Bags, and drying rack. We kept our camping chairs stored under the banquette bench (which also has an accessible door to the outside for easy access). Under the second bench seat we stored our manuals, a small toolbox, and a few extra blankets. We packed our suitcases, Swim Bags, Pillows and Cooler in the trunk of our Jeep. Once we popped the tent trailer and unloaded the font storage box, Hubby worked on the outside connections and I headed inside with the bedding. My son used the left bunk. All we needed to do is add a fitted sheet, and unroll his sleeping bag. His Luggage Stayed on his bunk during the day, and we moved it to the Dinette at night We limited my Son to his back pack for anything he wanted to bring, which he also kept stored on his bunk. 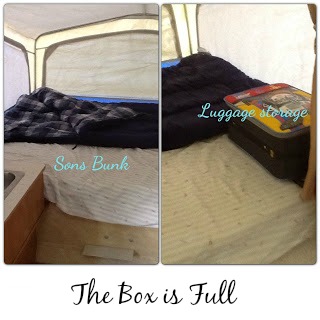
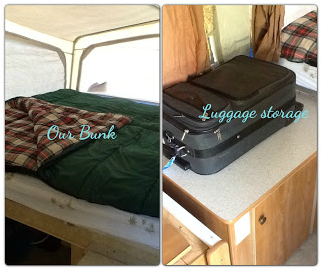
For our bunk, I did the same thing for bedding, and our Luggage sat on top of the storage cabinet next to our bunk. Our Bathroom bags/Swim Bags stayed at the end of our bunk during the day, and we moved them to the banquette in the evening.
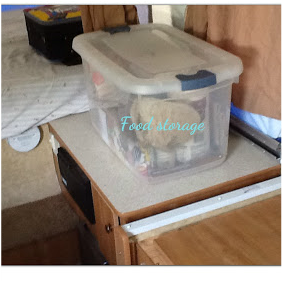
Our food storage bin (Check out this link to see what we pack in our food bin) was kept on top of the the storage cabinet next to my Son's bunk. This is directly across from the kitchen area and easily accessible. We would just take items out as we used them.
When purchasing items for your trailer, it's helpful to look for things that will do double duty. It's also helpful to purchase items that collapse, or nest inside each other or are smaller sized.
Now I can't take credit for the packing (my hubby has mad puzzle skills). We stored the following items in the lower storage cabinet (between the oven and the sink):
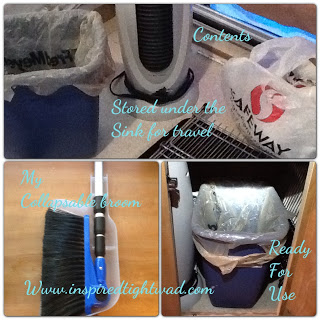
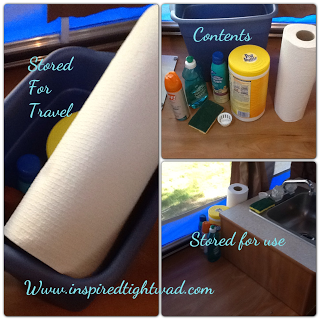
While we are traveling we store the following items inside our Trashcan: Bug Spray, Dish Soap, Sunscreen, Chlorox Wipes, our Sink plug, and paper Towels. After we set up we take these items out and store them behind the sink while we are camping.
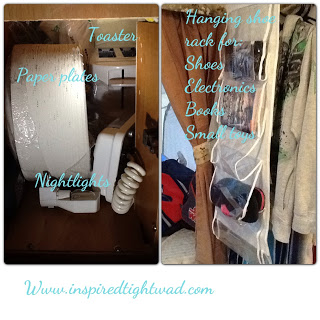
Below, our food bin we have a teeny tiny cabinet. We store our Toaster, Paper Plates and our Nightlights in here.
Above the food storage bin we are fortunate to have a collapsible hanging rod. This is where we hang out coats when not in use.
My best organizing find was our Hanging purse Organizer. In such a small space everything needs a "home". This organizer provides a home for all of those misc. things. We store all kinds of different things here: Our electronics, sandals, small toys and books, basically anything that is nice to have accessible but not laying around the trailer. We no longer trip on shoes, or have to constantly clear the clutter from the dinette. After returning from a trip we would air out the Trailer, and bring in items to be washed. Clean silverware, cooking utensils, pots & pans, cups, bowls, and sheets would be returned to the trailer before we closed it for storage. Using this method we were able to pack and unpack pretty quickly for our last minute getaways. I hope you have enjoyed my Tent trailer tour. Keeping your Trailer organized will allow you to enjoy your time with loved ones a little more. The time goes by so fast.
I'm looking forward to sharing our Class C tour with your very soon! Happy Travels! |

AuthorHi, I'm Melissa.. Mom to Connor. Archives
February 2017
Categories
All

 |
 RSS Feed

